Friday, March 30, 2007

Going to the store

Last night was probably our third major trip to a big-box retailer in search of supplies and lumber. We are trying to learn from this experience: It takes hours to get out of those places alive. The sooner we stop expecting it to be as simple as a grocery trip, the happier we'll be. (Wish we didn't have to at all, but the nice local small stores mostly close at 5.)

Why's it take so dang long? Well, for example, last night we needed to buy plywood for the bathroom subfloor. John had done lots of research in the tiling forum and had detailed instrux printed out as to which particular type of plywood we needed.

But we had a short-ish list of other stuff to get first--joist hangers, hacksaw blade, some screws, etc.--and with the overwhelming size and complexity of Lowe's, that stuff took a good half hour to find. (We need inch and a half screws, but they don't seem to exist. There's inch and a quarter, then inch and five-eighths. There we stood, gazing up at 20-foot-high shelves holding probably millions of screws, none in our size. At this point, my attention started to wander: the woman in red patent leather heels sitting on a lumber cart...interesting types of angled joist hangers across the aisle...the soft rock on the PA... Meanwhile, John was cursing and scratching his head.)

Finally, we made it to the plywood aisle. Nothing's marked, or it's marked in ways we don't understand and that aren't consistent from product to product. We can't even find exterior grade plywood. Finally we get a guy to come help us by pushing the little button on the unmanned help desk and waiting 5 or so minutes.

He's a nice guy, but he clearly thinks we're crazy for using exterior grade in our bathroom. And as we're discussing it, he keeps saying "they dip it in a chemical" which sets off a little alarm in my mind. We want to be green builders where we can, so we've talked about using stuff like denim insulation instead of fiberglass, and salvaged wood instead of new, but our lack of time and experience has kept us from ever considering green choices in plywood. What chemical is this stuff dipped in? Is it going to off-gas into our bathroom? Was the chemical dumped in a river somewhere after the plywood was dipped? As my dad likes to say, "chemical" is not a bad word; everything, including water, is a chemical. But still, it'd be nice to know more about what we're buying. When we lifted one of the sheets off the pile, a smell filled our nostrils. It was a "chemical" smell for sure, and I don't mean watery.

Between environmental worries and the fact that this plywood was completely buckled and curvy, we were stymied. Talking to the flooring department didn't help: Our plan of putting down soapstone seems to put us in some sort of specialty universe where Lowe's does not venture. In the end, we decided--more to feel like the trip wasn't wasted than anything else--to buy the sheets we needed and return them if they weren't the right stuff.

Next 20 minutes: searching through about 12 sheets of each size to find 3 decent ones. That's about the ratio we've found with any wood product we've bought. It's heavy, smelly, splintery.

We wrestled it into the minivan, tied down the gate. (Total time spent at Lowe's: 2 hours.) Drove to the house, wrestled it inside.

Heated up soup, ate standing up, looked at our floor frame and thought of ways to brace up the big hole in the pattern where plumbing has to go. We'll add some 2x4s to support the tub and toilet there. Then we got our door frame into position and put down some plywood (nice, straight plywood scraps that came with the house) just to be able to visualize the bathroom wall and find the angle for the door. Hey, it sort of feels like a room when you do that! Wow. Made a list of stuff we want to accomplish when my dad's here this weekend.

Went home.

Then, this morning, found out we bought the wrong plywood!

- Erika

Wednesday, March 28, 2007

Funky Joist Pattern

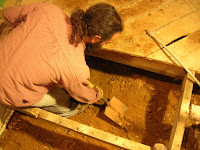
The bathroom floor has been framed!

Took a Sunday and two weeknights to complete. We made a few rookie mistakes - adding a doubled trimmer before nailing a set of double headers, for instance - but it's strong none-the-less.

Observation: the old wood is so much harder than the new pine.

We're pretty close to putting down the plywood now, which is really exciting. There are a few more things that we should take care of before that though, if we want to make life just a little easier down the road. They are:

- Hole saw joists and notch out braces for radiant tubes
- Finalize wiring routes in shared walls
- Put down a vapor barrier in the under-bathroom crawl space
- Saw off the exisiting drain stem that will accept the bathroom sink drain
- Determine the exact location of the proposed angled wall and cut away the old subfloor from underneath it

After we get those things taken care of (Thursday? Friday?), we will be ready to put down some plywood. Not to get ahead of myself here, but I think after that we'll be able to bring the bathtub back in! Holy cow!

Oh yeah, when we got to the house yesterday afternoon, there were thousands of lady bugs crawling all over the windows (both sides) and walls. We spent about 15 minutes shopvac-ing them. Dumped the bodies in the woods. They have officially worn out their welcome, lost their charm.

- John


Monday, March 26, 2007

Joist to the World!

Sunday, we began building the bathroom floor frame. It was a good move to have planned and diagrammed the floor frame the week before. We were able to focus on leveling, shimming, cutting, and toenailing.

Even still, it took all day to frame about 3/4 of the floor. But that's okay. The important thing was that we finally had sawdust on our floor!

One of the best moves we made all day was fashioning a saw guide out of a square and a C clamp. Perfect cuts every time! Erika became handy with the circular saw, I felt good about drilling small pilot holes to help with the toenailing, and all in all, everything is turning out level and sturdy! Our plan seems to be working and the plumbing is fitting nice and snug with the frame.

A good day!


- John

This one has plenty of pictures

A little photo essay on the state of the house, circa late March.

Old tree character, an extra house (one of many).


Saving door trim and the occasional plank.


It came furnished, sadly.


More ductwork than you can shake a Jacuzzi at.


Thank you to the gardener.


Three kinds of empties.


Step back from little nails and look up.


The suit.


We do not yet have recycling service. Purrrrrrrrr.


Oh dear.


This one speaks for itself.


No cooking going on here.


We do take breaks.


Please go away, ladybugs, or we will be forced to shop-vac you.

- Erika

Tooling the bead

Saturday morning we slept in a bit and had a nice relaxing breakfast outside at the picnic table, under the tree, about 70 degrees and sunny. Shortly after, the perpetually dusty clothes went on and we headed off to the house. Along the way we stopped at a neighborhood antique store to scope the scene for a dresser that might make a nice bathroom vanity. Also made the usual stop at the hardware store, this time to pick up some pvc sealant (please work...please work) and rent the crimping tool and gauge for the pex tube fittings.

I immediately set to the task of sealing up the pvc leak. I rubbed it down with alcohol, cleaned it up nice, and loaded the stuff into the caulking gun. "Tool the bead for a good seal," it says.

I had two goals for the day: Replace the water supply lines between the water heater, bathroom, and kitchen with pex tubing, and finish positioning and gluing the pvc drain for the future bath. I'm happy to report that we met those goals!

The pex tubing job was pretty much as I envisioned it to be, minus a couple of snags at the start. Once we got the hang of it, it was pretty simple. Erika stood in the basement with the 100' roll of it and I crawled into the crawlspace and took one end from her (through the access hole to the basement). I just reused the 3/4" hangers that were already in place from the old tubing. No sweat. It took about 10 minutes to make the first run. The next run was to go from the end of the first run and back to the bathroom. The last owner ran 1/2" tubing from there and we want to run 3/4" up to the fixtures. That meant the existing hangers needed to be removed and replaced. I sped off to the hardware store and picked up 30 or so plastic 3/4" hangers and jumped back into the crawl space suit and slithered under the house.

I could break the old hangers and their nails with my gloved hand. So it was like this: I'd start in the bathroom, holding the end of the pipe, and crawl under the floor to the far end of the house while Erika fed me more tubing. Then I'd work my way back to the bathroom, on my back, breaking the old hangers and nailing up new ones. Then, crawl back to under the kitchen and make my way back to the bathroom on my back, hanging the pipe. There - hot water run done. Repeated all of this for the cold water lines. Still need to hook the lines up to the kitchen sink, and need to finish the job in the basement at the water heater. I need to do a little more research before making the kitchen connections, and the water heater area can be taken care of at any time of day, since it's in the basement and easier to access.


We sat on a boulder along the creek and ate dinner. It was nice. We were hungry.

After dinner I glued the upstairs drain together, that waterpark-lookin' chute from the future bathroom that feeds into the new wye. Another nervous task, but in the end we got it glued in and lined up perfectly. We left by 9:30, feeling accomplished. What a treat!


Wye me?

I was nervous about cutting into the 4" pvc drain line between the soil stack and the existing wye which is 4" from the foundation wall. Only going to get one shot at this insertion. I was so nervous about this job that last week I even tried to reason my way out of prepping the drain line for a future bathroom altogether. "Maybe when we're ready, we can hire a plumber to splice the line." Yeah - do plumbers actually crawl into 8" crawl spaces to cut and splice drain lines? Might as well do it now, while the floor is still off.

First step was to dig out from under and around the section of drain line to be cut. Second step was to clean the pipes. Third step was to measure. Fourth step was to walk around, delaying - er, visualizing. Then measure again. Cut.


Glued a piece of pipe into the new wye so there would be enough pipe on both ends for the rubber sleeve. Slipped the rubber sleeve on the pipe downstream. And now for the moment of truth, the gluing and inserting of the wye (you get like 3 seconds with pvc cement). Got it! What was that cracking sound?


Yes, a coupling further up the line had cracked. Grr! It actually just fell apart. Sanded and re-cemented, then Erika poured some water down the kitchen drain and I kept my hand under that joint, waiting for water. None! But no - there is a leak back down the line where I was working, at the old wye (not the new one). How the hell are we going to fix that one? There's really no more room for cutting and splicing because it's so close to the foundation. Hope there's a decent pvc sealant on the market, because even a slight leak downstream from the toilet is really no good. Tomorrow.

Erika sez: Though I was mere feet away from John, I was in another world. He was gingerly gluing PVC together and I was gleefully tearing down a wall. Yes, the little kitchen wall that we've been looking forward to taking out since the first time we went inside the house is now in wall heaven.

With a crowbar, I'd taken off what I could two nights earlier and this time we'd brought the Sawzall with us. Having never used it before, I figured I'd experiment with it on, you know, a major bit of demolition.

I sawed through some thinnish pieces above the ceiling joists so I could pop off this wide plank that was sitting on top of the wall header. (Rain of dust and god-knows-what as we tipped it down off its long bent nails.) Then I attacked the header where the wall met the load-bearing wall that separates dining room from bathroom. I can't say I went right through it--found the tool pretty challenging, what with all the VIBRATING and the holding above my head and the chunks of wood CHIPPING OFF into my face. My first cut was crooked and John had to help me. But after the header was cut on both ends, I was able to pry it off pretty easily. And once the header's out, you got no wall. Down came the door frame (laid on the kitchen floor for re-use in the bathroom), down came the studs, down came the last of the drywall.

I have to say this is probably my favorite project so far. Taking down a wall! Damn! We are living some life here. And the place is starting to look really open now, the way we've imagined it.


Friday, March 23, 2007

End of the 8 Day Week

Wednesday. We purchased a couple of 4" PVC pipes and various connectors so that we could splice a drain line into the existing main drain. This new drain line will someday accept the drain from an upstairs bathroom. You know, like, when we really feel like building a bathroom from scratch. We want to get this figured out now so that a year or two down the road when we build our upstairs bath, we won't have to figure, saw, position, and glue on our bellies with 10" of clearance in the dark. The floor's off, do it now.

Erika, back in the crawlspace, was now holding 12 feet of 4" pvc flush against the bottom of the floor, where one day it will meet with the upstairs drain pipe. I was positioning it's landing point from within the existing bathroom, then marked it off on the footer with duct tape.

While I spent my time configuring elbows and pipes, Erika picked up her trusty crowbar and began dissecting the partition wall between the kitchen and bathroom. She worked carefully around the doorframe. I dismantled a light switch and she removed the wiring and kept at the careful deconstruction. We didn't plan on needing any power tools that night so we left the saws at home. But had we had the reciprocating saw on hand, she would have had that door frame out in one piece, trimmer studs and all. We'll be able to use that door frame for the bathroom.

That was Wednesday. Thursday night is a night off. Sleep is required. Ssssleeep is zzzzzz...


- John

What were they thinking!

Okay, it's Friday and I can't really remember what we did Tuesday. Oh yeah, I remember now...

I had been spending time reading up on what constitutes a "load-bearing" wall. I know what it means to be load-bearing, but how to tell if a wall is or is not an integral part of your house's stability? The more I read, the more certain I became that the wall in question is not actually load-bearing. But at the same time I realized that perhaps the most integral feature of our floor plan might be at risk - all the clues were in front of me - a previous owner had removed a load-bearing wall without ever compensating for such a weakening of structure.

Flashback: The first weekend that we were at the house working, in fact it was the big crawlspace day, a really nice guy pulled up to the house and chatted us up about how he had been interested in the place too. He asked to see the inside and after we showed him around a bit he told us that he was a contractor and if we ever had any questions to just give him a shout.

Back to the present: So I shouted for him. He met us at the house 'round 7, just as we were finishing up our spicey Thai dinner on the porch. Couple of quick questions for him: is this wall load-bearing and was there ever a load-bearing wall between the dining room and living room. Both answers were as I predicted them to be. We could safely remove the wall we want to (between the bathroom and kitchen), and yup, support is needed where once there was a wall and hey look - the top plate that they left, now functioning as a girder, is sagging.

It's amazing when a builder or any other professional tradesmen enters the house. They can just point to things as quickly as they're thinking and rattle off methods and options. He showed us how we could build a couple of temporary walls to hold up the attic while we cut the studs and jack an oak beam into place. He showed us how to remove the other wall and preserve the door frame. What a guy!

So there we had it. A couple of new, completely unexpeected jobs piled on us. Guess we'll be having a nice oak beam milled soon!

We were tired. [Erika here: I don't mind saying that I wasn't just tired, I was weeping. Putting beams in? That sounded about as doable as building a whole new house. But then I got over it. Sure, beams, why not?] All I really had the energy to do was to trace all the water pipes (basement, crawlspace, kitchen, and bathroom) and count up the various connectors that I'll be needing to purchase for the poly to pex upgrade that we've got planned for this weekend.

- John

Wednesday, March 21, 2007

Dusty Bottoms

The fact that we forgot the circular saw at home was not important. You know, it was a good thing in that it allowed us to dedicate the evening to planning the new floor joist configuration in the bathroom rather than feel pressured that we weren't cutting any wood.

We ate our dinner in silence on the front porch. Erika was studying up on exhaust fan venting and I was brushing up on floor framing. Inside, we began by tacking nails in the sill in a 12" on center joist pattern so we could string up some lines and get a visual reference. This really helped visualize what obstructions we will have to overcome.


For every joist you interrupt, you need to double up the headers and trimmers. Simple concept. But the pattern multiplies quickly when you're trying to navigate around a diagonally-descending tub trap or a closet flange. This wouldn't be much of an issue if we didn't have to bear in mind the 9" between joist placement of our heating tubes down the road.

Erika sketched the layout and that helped us draw in some possibilities and get a better handle on the options. In the end, we ended up with a plan that basically boxes around the closet (toilet, commode, crapper, whatever) and the tub plumbing and relies on two stacks of cinderblocks to ensure good strength on either side of said box.


Didn't even break a sweat. But we did have to shower. Our place is the dustiest.

Addendum from Erika: Just as we were finishing up, I looked up and saw a fat mouse sauntering along the subfloor. It looked me brazenly in the eye and then ducked into the crawlspace. I'd never seen a mouse so completely unconcerned by the presence of humans. Of course, it may never have seen a person: the house has been sitting empty for over 2 years. It's a mouse house.


- John

Bloody Sunday


It wasn't too gory, but our house was blessed with the blood of John's mother when she had a mishap involving a spade fork while cleaning out one of the overgrown flowerbeds by our front steps. Luckily, the wound wasn't too bad and was patched up immediately with good ol' duct tape. I can tell you we've already added both sweat and tears to our little castle, so now it's really part of the family. Plus the house looks all spiffy now when you drive up to it and see the nice clean bed.


Sunday we generally spent continuing Saturday's work. I went back into the crawlspace and watched some TV. No, wait, I tore down the remaining metal duct, basically a big piece of sheet metal nailed to two joists, and pulled it through an opening into the basement. I'm getting used to being in there; I swear it's almost comfy. I mean, you're lying down. (Later I was eating a beet salad for lunch and John's dad said it was funny that I was spending so much time in the crawlspace and then eating roots.)

John and his dad, meanwhile, started working on the project of putting new floor joists into the bathroom. We have to double them up to support our soapstone floor, and one of them has to be replaced too. There were a lot of scraps of subfloor left around the edge of the room, between the trimmers and the bottom of the walls, which were tricky to get out. I'm not sure what-all those guys were doing in there, but various power saws seemed to be involved.

I made a run to the hardware store for a bit that would take out sheetrock screws, then started working on getting them out of the kitchen ceiling. Kind of a tough task, as many of them break off or, due to my limited power tool skills, just won't come out. Worked on the living room ceiling too. Lunch was on the back patio (a concrete slab that I realized I desperately need to build a deck on top of, someday) in order to soak up the warmth. Leftover corned beef and cabbage for J and his parents, leftover beets for me.

It's a little unnerving to see the physical work slowing down somewhat, but all this planning and figuring is definitely important too. And it was so great to have help from people who have done all this before. John's parents rock. It also rocks that we all still have all our toes.

Other stuff:

- John learned how to remove, replace, and relocate electric sockets and circuits
- Temporarily sealed up the main plumbing vent up on the roof


- Erika

Monday, March 19, 2007

Planning is the time-taker

If we ever are to farm, we'll need to figure out how to rise with the sun. Until then, seven o'clock on a Saturday will still seem pretty damned early. Layered against the crisp winds, coffees in hand, Erika, Dad and I rode the interstate over the Blue Ridge into Waynesboro for our first big materials purchase. The morning was so clear and the mountains looked typically beautiful, dusted by snow and ice.

PVC pipes and connectors, primer and glue, brass tub drain kit, hundreds of feet of pex tubing, pipe cutters, nails, joist hangers, circuit tester, romex wire, boxes, pine planks, and so on. We had to stop shopping so as to not overload the van - we had to get back over the mountains.

Picked up some sandwiches on the way back through town, ate 'em up at the house, then got started. Almost 1 o'clock. Unstoppable, Erika was in the crawlspace with the crowbar, prying out the original wood forms that the concrete foundation and chimneys were poured into. The crawlspace is loaded with termite food like this...unbelievable.

Meanwhile, Dad and I started the tedious task of measuring lengths, heights, slopes, and angles for the plumbing system. This would include the tub trap and drain, the trap arm, and how and where it connects to the main vent. Tricky business, especially when the location of the actual drain opening in the bath tub is measured to fall over what is currently thin air - how do you measure from there?

Well, we sank a nail in the nearest joist so that the top of the nail was the height of the proposed subfloor (and consequently, the tub drain) and then sunk a stake into the dirt to mark the lateral spot at which the drain would line up. Attached a level to a line of string, and marked the height on the main vent. We calculated the length of the run and the necessary drop (1/4" per foot) and marked that spot on the vent. Compensated for the offset caused by the actual pvc fittings, and we were ready to glue our first piece of pvc into place.

By the end of that day (8 o'clock), we had the new vent in place as well. Pretty much, we had taken the plumbing about as far as we could. What's next is to actually place the tub in the room so we can finalize gluing and drain positioning, but we can't do that until we have the subfloor on, and we still need to frame the floor.


We decided to use the reciprocating saw to clean up the edges of the floor where the original floor planks were still sticking out from the base of the walls. Dad sawed while I followed behind, chiseling and crowbarring what was left behind. With that completed, we have a nice flush surface to nail our new subfloor to and it should slip under the existing walls nicely.

We stood around outside in the gloaming, listened to stories from when the house of my childhood was built, and drove home. Mom had been cooking for half the day! The house was warm, the table was set, a St. Patrick's day feast of corned beef, cabbage, potatoes, and beets was ready to eat - and there was her famous spinach and artichoke dip appetizer as well as dessert! Hooray!


- John

Friday - Parents Make the Scene

Although it had been fairly warm for the past week, Friday was gray and rainy and cold. And isn't it something that that afternoon, meeting my parents at the house as they finished their drive up from Florida, that it would start snowing!

Mom got some coffee going to keep us warm and my Dad and I stared down into the open pit that is our bathroom and mulled over the plumbing scheme. "What we've got here is a piece of cake," he said, sipping off the coffee. Well I'm glad someone thinks so!

We decided to take out the existing metal plumbing (the stack/vent and all of the bathtub plumbing) and replace it with pvc. Out with the reciprocating saw and off with the stack. Mom moved the two big piles of rocks unearthed during The Great Crawlspace Digout from the living room out to the woods. Erika showed up after work and worked on cleaning up the dining room ceiling some more. Dad and I figured out a parts list for the plumbing project. We also put together a shopping list for bathroom subfloor and wall construction and the upcoming electrical projects.

We caravanned to the building supply store and fanned out across its wide aisles. But alas, the store was closing up and we weren't going to have the time we needed to shop carefully, so we put back the handful of supplies we had gathered and headed out to a late dinner before making the long drive back to the farm.

- John

Friday, March 16, 2007

This is Working Too

When you spend a lot of time reading accounts of amateur builders' mistakes, it freaks you out and can rattle your confidence. When you follow Internet forums that are packed tightly with experts and then make the mistake of digging even deeper (for example, into a forum where actual building inspectors hash out the details of an acceptable/unacceptable light switch), it might even drive you close to the edge. Sometimes all of a sudden, the reference books you own seem too basic. You wish you didn't have that extra afternoon cup of coffee.

We arrived at the house feeling a little bit uncertain. The mission was fairly light - finish digging out the section of crawlspace, make a few observations about wiring paths, and work out exactly what items should be on the task list for the weekend. We also wanted to quit early enough to leave time for laundry and an extra hour of sleep (ah, seven hours of sleep feels much better than six).

The garbage pail was filled with dirt from the final round of shoveling the night before. We had simply run out of strength to empty it. Erika made short work of the remaining shoveling while I examined the routing of the old wiring that was never switched out of the house. There's not much of the old stuff, but there are several receptacles that need to be updated, and we'd like to add several more. It would be nice to have the studio on its own circuit, too.

Energy was low. Nerves were a little tight. We had hit our first stopping point. The bathroom plumbing simply needs redone. The soil stack needs to be replaced, a venting configuration for the sink needs to be figured. The existing drain pipe from the tub is 1.5" and should be 2". Will the toilet be too close for code approval given the current configuration? How are we going to line up this drain again once we swap out the old iron for PVC? How can we rough in the plumbing if we don't know where the sink is going to go? Light fixtures? Where is this wall going to run, exactly? Oh my.

We stepped back and thought things through a bit. A sink against the outer wall, as opposed to the corner, will give us more counter space. We want the wall to end at that stud. I tried to keep from staring down into the plumbing and twisting my lips in contemplation.

Took a stroll into what will be the temporary bedroom and gazed up at the ceiling. Haha, I mean, into the attic. There should at least be a ceiling in this room if we're going to sleep in it. But before we can put a ceiling in we need to add joists up there to support what will be a master bed in the attic and we'll need to run and insulate the radiant tubing under the attic floor for the upstairs zone, which means we'll need to layout the radiant system and determine where the hydronic line will enter the house - which means we need to dig the trench - and determine where the outdoor furnace will go. The house as a system. It's all tied together. We can't even think about something as simple as putting up a ceiling in a bedroom without first knowing where the furnace is going to go. Can you believe that all this even led to making a decision not to use stone on the floor of the kitchen? Trust me when I tell you that it all comes back to needing a ceiling on this bedroom before our lease is up back at the farm.

But this is working, too (titula'!). I was about to type something like, now we transition from hard physical labor to skill and systems design, but then I remembered Erika telling me that while I work on the plumbing with my Dad this weekend, she might head back into the crawl space to pry away the original wood forms from the foundation and chimney.

Perfect timing that my parents are coming to help us this weekend. They have experience with this stuff and don't seem too worried about our plumbing or electrical issues. We tried to relax and leave it at that. We gave some thought to what needs to be done next and tried to feel good about knowing we should have more answers the next day.

Rain drops were tapping the metal roof. "Our first rain," Erika said. It felt nice to hear these sounds in the house for the first time. And, I was able to spot where the roof is leaking from.

- John

Thursday, March 15, 2007

A job we actually know how to do

...dig, that is. We are quite familiar with the proper use of a spade fork and shovel, having dug our garden beds to a depth of two feet last year. So it felt sweet to rip into the ground and just do it like we know how to, after a week of feeling our way through these unfamiliar tasks.

Wait, what digging? First things first. After a quick after-work stop at our friendly neighborhood hardware store (the proprietors are Brian and Ryan, pronounced Virginia-ly like "BrahnnRahh"), we put on our work clothes, heated up some chili and talked to the same nice old beagle who visited our campfire last weekend. (Is he a border collie beagle? Aw.)

The big item on the agenda was to take up the subfloor in the bathroom, since we know we'll need a different type to handle our soapstone flooring. But we're unsure whether to tear up the rest of the subfloor too, in the adjacent area that's going to become a part of our open kitchen/dining room instead of whatever it was before (part of the bathroom? A huge closet? A place to store 4,000 rolls of toilet paper?). We don't know what the flooring will be in those 40 square feet or so--soapstone or something else entirely. I, being somewhat barnacle-like in my tendency to resist change, feel like I want to leave it in place despite John's very reasonable case for why we should rip it out. It looks old, handmade and really solid, but it's also kind of uneven and has some damage here and there. We decided to leave it for now and figure it out later.

John busted out the serious-ass circular saw my dad gave us for Christmas ("You know it's pro when it doesn't even have a safety," says John) and started taking out the big planks. Our house has stood since 1932 and this amazing tool can go right through the flooring in a matter of minutes. The bright, raw cuts were such a contrast with the dusty, worn surfaces of the planks. He'd cut along a joist with the circular saw, then along the footer/foundation with the jigsaw, then prybar it up. Soon we had a big hole in our house: just joists spanning over bare ground.

before digging


Meanwhile, I kept chipping away at cleaning the ceiling joists and corners in the dining room.

Once the subfloor was up, we jumped down between the joists and digging commenced. John loosened with the fork, I shoveled into the garbage can--pretty much exactly what we know how to do from the garden. The reason we were doing this was to make it easier to deal with the crawlspace once the floor is back on. We were shoveling out rocks, insulation scraps, random trash and plenty of soil, getting down to a depth we can handle and, incidentally, creating a surface of nice clean dirt instead of all that nasty debris. It was nice to get a look at the soil, which we'll get pretty intimate with in the future once we're growing veggies here. We said "Soil's not bad, except for all the rocks..." and then wondered how many times we'll say that in the decades to come.

People, let me tell you something. John is a damn hard worker. I think he's part badger. Turn that man loose on a pile of dirt, and he will MOVE IT. Then he'll roll the heavy garbage can full of soil out through the kitchen and the back porch, upend it onto the grass, and go back for more. The crawlspace looks so smooth now, I feel like planting tomatoes in it. Too bad we have to cover it up and put a bathroom over it!

Anyway, we got most of the digging done, cleaned up, then split.

- Erika

after digging

Wednesday, March 14, 2007

Cast Away!

We took Monday off, okay? We needed some time to let sore muscles heal, to do some laundry, give the cat some attention, and you know...make a week's worth of chili for the coming push.

So yesterday, Tuesday, we went to our local Habitat For Humanity store to see what we could find. Specifically, we were looking for windows to replace the upstairs bay, and an exterior door to seal up the attic exit to the deck. This is harder than it seemed. We brought with us measurements of the rough openings but that wasn't enough. Used windows come in all shapes and sizes, conditions and styles, and we actually left with more questions needing answers researched.

We didn't get to the house until around 7. A late start. Sat on the front porch eating chili, and listened to two songbirds calling to each other - one near the porch, another across the road, deep into our neighbor's yard.

The first order of business was to cut out the rotted planks in the bathroom that would need replacing. It wasn't so hard to get these sections of plank out, and once we did, we were able to get a good look into the once impenetrable section of crawl space.


Erika, as if driven by instinct (or maybe it was revenge), dove in head first and pulled out the remaining insulation. There was a huge rock that had also blocked the way, snuggled up to the drain pipe. I was able to step into the space and excavate that. We pulled out old pvc pipes and various scraps. Just to see what we were standing on, we thrust our trusty spade fork into the earth below - soft. We can dig this out.

So now we had a couple of things to decide. Earlier in the day, I had discovered a great tiling forum while in search of subfloor considerations for soapstone. Some there suggested removing the remaining planks altogether and replacing them with two layers of 3/4" plywood which would provide better "deflection" for tile floor while keeping our floor thickness to a minimum (the planks in place now are 2" thick). Floor thickness is a concern of ours since we plan to install a radiant floor heat system.

Do we tear up these planks? It's sort of scary to think about big hole in the corner of our house, the size of a bathroom. And what about that bathtub over there? The layers of linoleum and ply underneath it are pretty rotted and probably moldy. Are we delaying the inevitable? Think it just needs to come out, if we're going to do this right.

After a quick consultation with Dad, we decided we should just go for it. We disconnected the pex fittings and the brass tube of the stopper. With a utility knife and a flathead screwdriver I cut and stripped away the sealant all along the wall (okay, it's just a 2x4!) and under the remaining tile.

Now you've got to understand - a cast iron tub weighs close to 300 lbs. We gave it a few jerks and it did not budge, but it was difficult to tell whether this was because it was still connected somewhere. We got the scissor jack out of the van and found a tiny edge that we could stick it under. We jacked it up a bit and saw that it was moving. Long story short, we ended up having to cut away part of the 2x4 ledge that the long end rests on and we had to remove the lowest layer of tile. This was a slight emotional setback since we kind of hoped that this tiled wall could stay (save money, save time), but it was probably for the best that we did this because behind it was revealed to be old moldy backerboard and rodent-chewed insulation.

Levering the tub with the crowbar, Erika noticed the drain was still connected. I spent a half hour in the tub trying to free the drain connection with WD-40, the screwdriver, and a hammer, while Erika started pulling out nails and sheet rock scraps from the dining room ceiling. After a second good WD-40 soaking and having bent up enough surface area to get a grip, I was able to unscrew the drain flange inside the tub with a pair of vice grips (which were left at the house...thanks again sellers!). So that's how it comes off!

Having cleared a path over the electrical and rough in plumbing, we were ready to try and move this thing out of the bathroom and into the kitchen. With a lot of body repositioning and unsure footings, we managed to hoist it several feet and onto more solid ground. That's when we discovered that if you tilt it onto one edge and find that balance "sweet spot," the tub isn't so heavy. Keeping it balanced, we moved it through the kitchen door and against the wall in only a few minutes.


We tore up the subfloor that was previously under the tub. I've got that technique down now and it only took a few minutes to pry all the flooring away. We cleaned up our mess. It was 11:30. Time to go home and go to bed.

Soreness

The day in the crawlspace really took it out of us. Bruised and abused, we decided to spend Sunday in the hospitable light of day. We ate breakfast sandwiches on the porch of our old place, our lovely (and cheap) rental, the house where we got married…not that I'll be sad to leave or anything. Anyway, breakfast, then off to the project.


Taking out the big window in the attic seemed like a straightforward, useful and pleasant task. A previous owner had put in a bay window (the center pane of which subsequently blew out in a storm), and we knew from old real estate photos that the original flat window looked a lot better with the proportions of our house's façade. So we ripped off the plastic covering the hole (well, "covering"; actually it was only attached at the top, and the sound of its flapping in the wind was definitely contributing to the creepy, abandoned feel of the house), then dismantled the frame piece by piece. The two side parts, the angled windows, were old and original to the house, with lead weights. It all came apart pretty easily—trim, windows, roof, supports.

And standing on a roof is always exciting. I felt bad for breaking a drill bit taking out screws, but John assured me it's normal wear and tear. I'm such a newbie at power tools and afraid of breaking stuff. That'll change, I'm sure.

Once we were done: wow! Our view is sweet! I pictured two rocking chairs in here once this is our bedroom, facing the mountains. Supah nice. The window is huge once it's not divided in 3.


Our other big accomplishment was to clean up the ceilings in the front bedroom (which we'll occupy when we move in in two months…er, one month and three weeks--!) and the kitchen. Just taking out nails from joists and getting the drywall scraps out of the corners. Pretty easy and satisfying. The kitchen has screws, not nails, so we'll have to finish that when we go back with our new drill bit. Same thing has to be done in the rest of the downstairs. Now we're ready to put up light fixtures and ceilings, then paint. Feels nice to know we can have a finished bedroom, a little retreat from the chaos, without too much more work.


Our friends came over for steaks on the fire pit (which is huge and well-seasoned), beers, and the tour. This was our first hangout at the new house! Stars were out, a hound dog came by to visit, bunnies rustled in the bushes. But we still haven't seen the moon…


- Erika